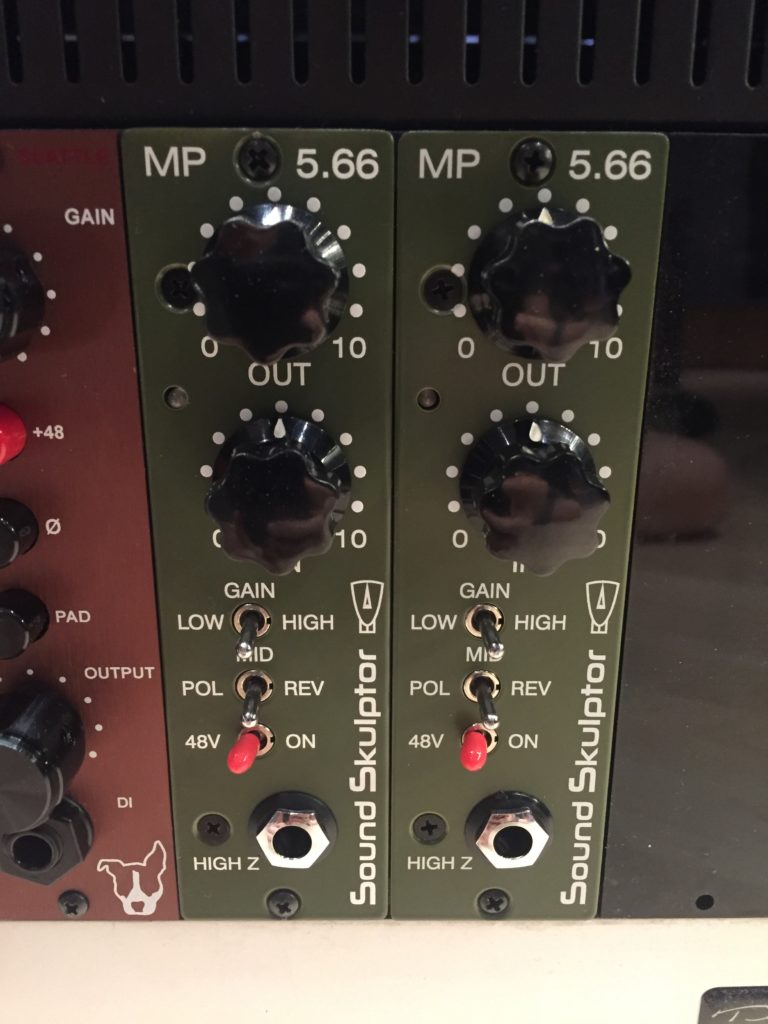
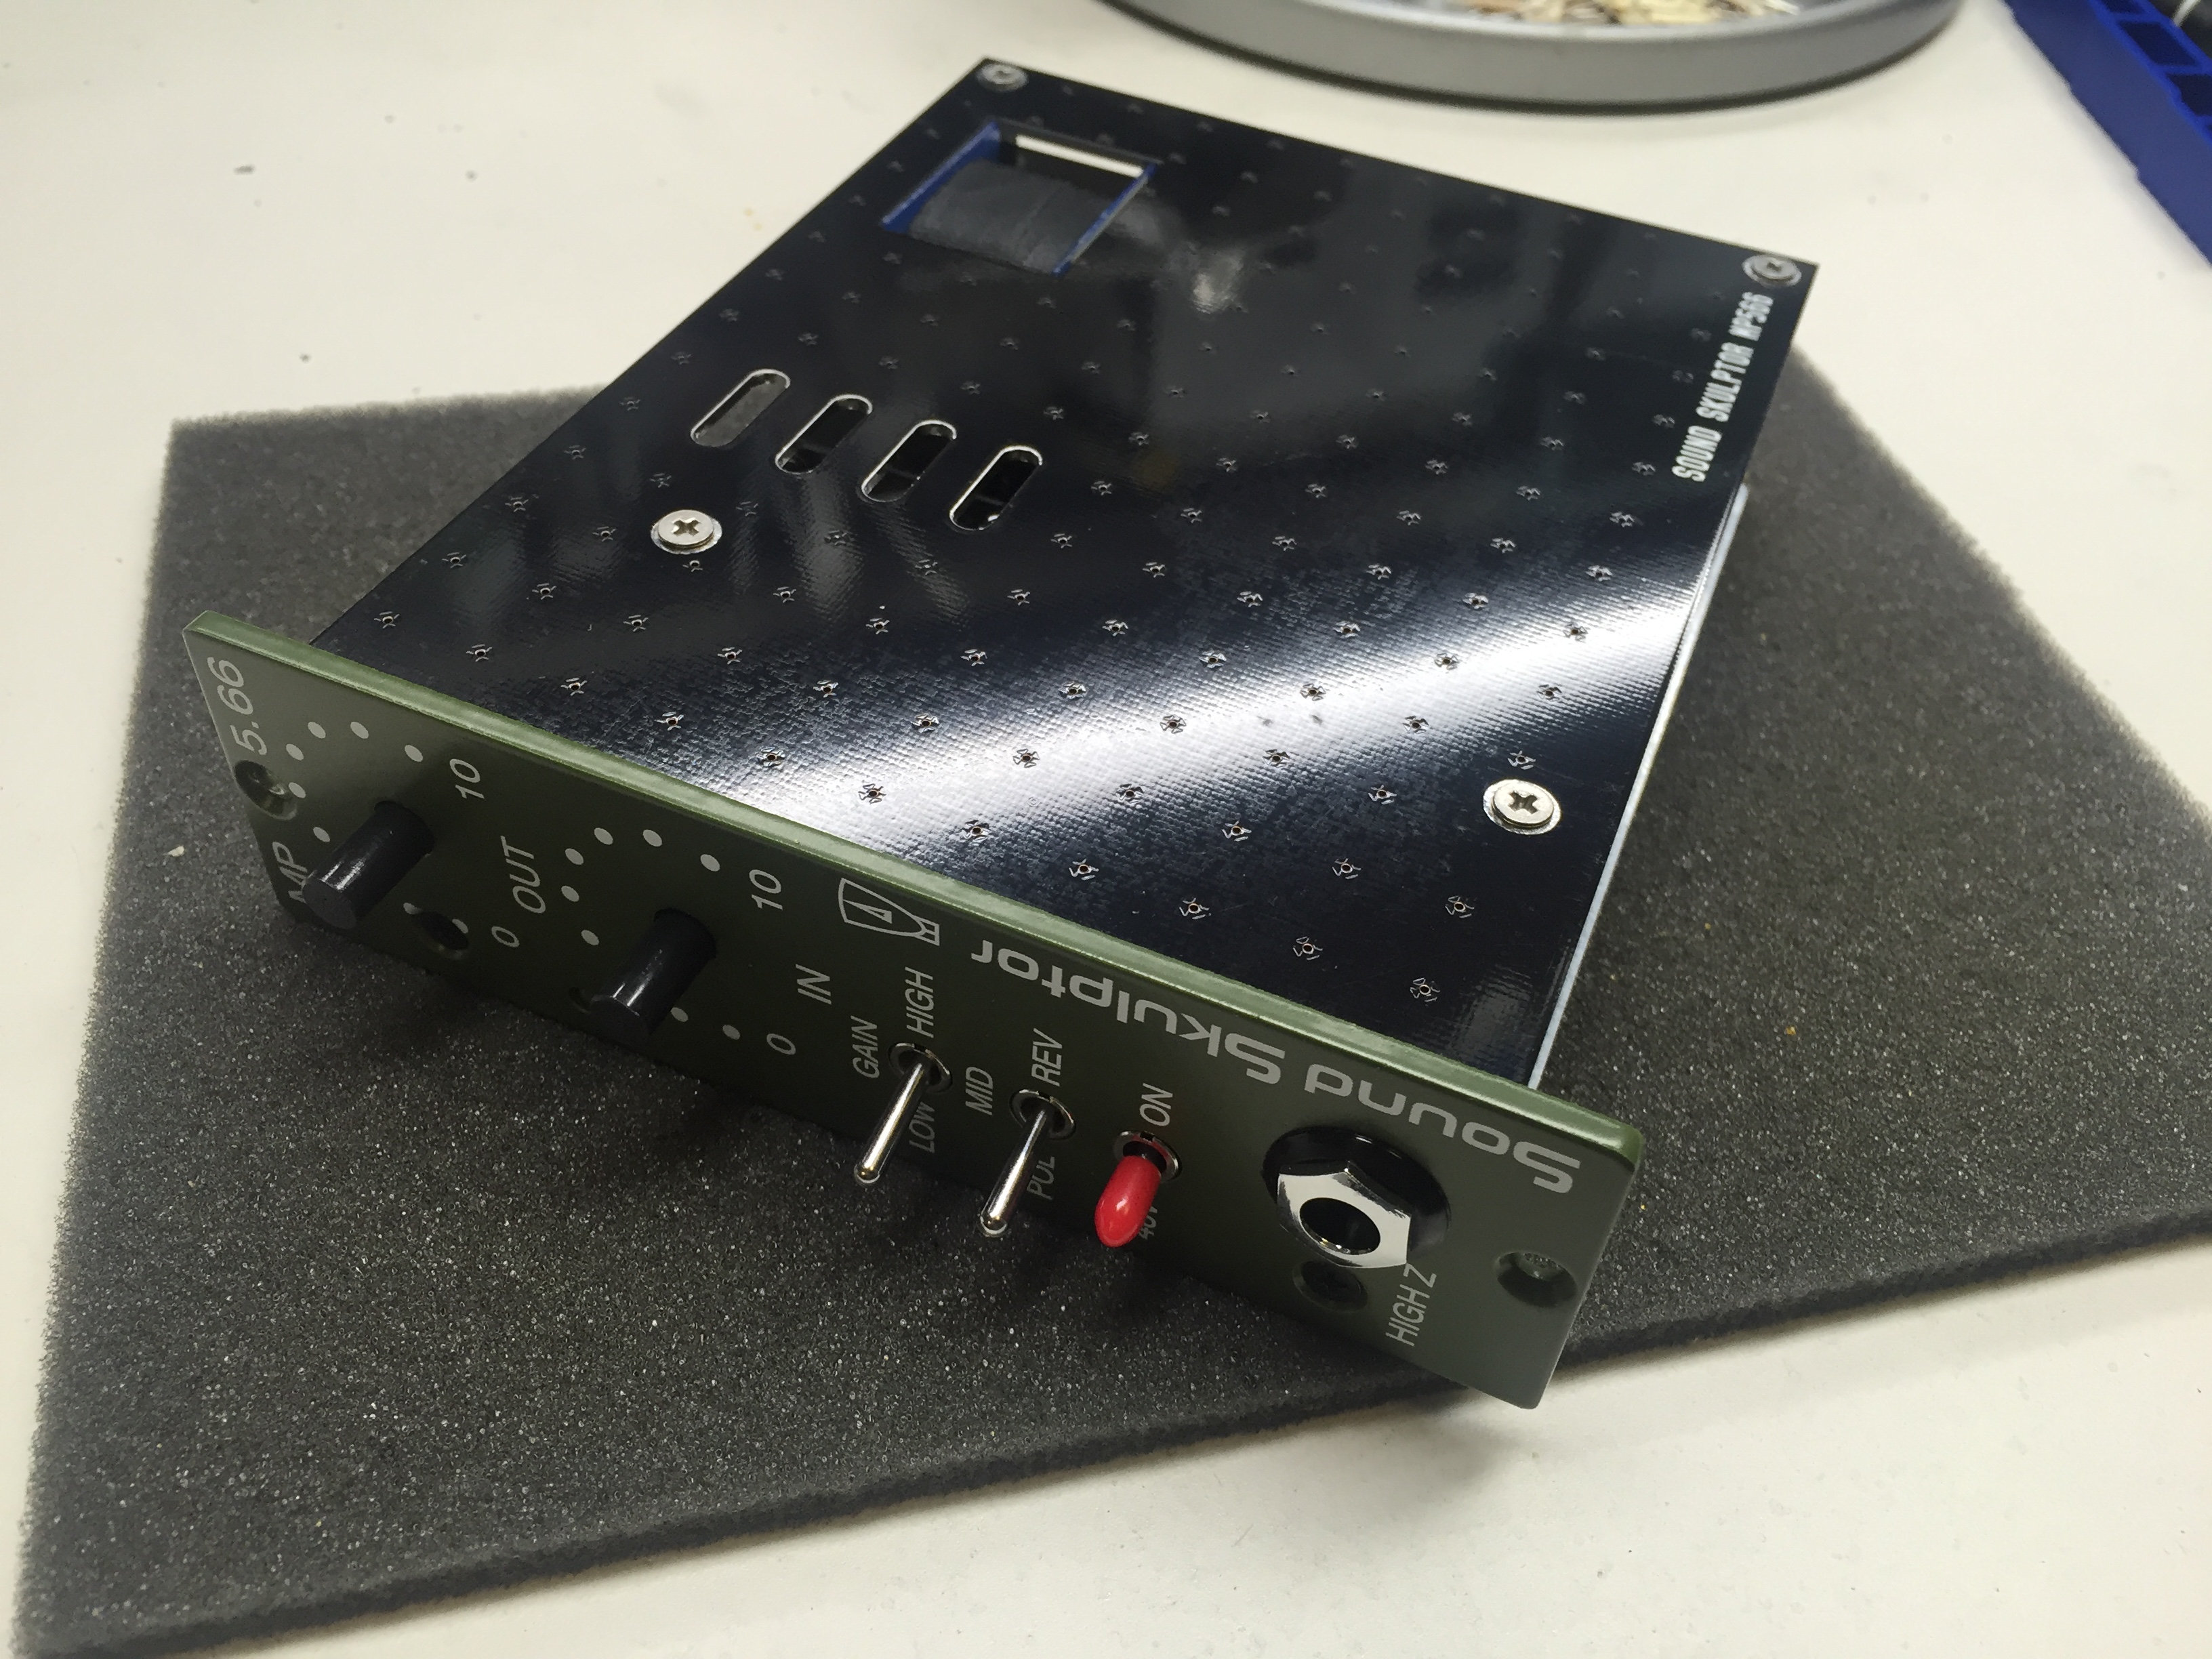
After a couple weeks building compressors, this week it’s back to building pre-amps. On the workbench are a pair of MP566 tube preamps from French DIY designers SoundSkulptor.
Many DIY projects such as the MP566 are based on some famous piece of gear, often decades old, which has either long since gone out of production or for which the patents have expired. As a result, most of the time these recreations will unapologetically use the same or similar model number to the unit they’re mimicking, (such as the JLM LA500A) or the marketing material will at least name-check those famous pieces of gear (like the Hairball/MNATS FET/500).
What’s odd is that SoundSkulptor really doesn’t do either of those things with the MP566. SoundSkulptor’s website mentions that the MP566 is “a dual-triode vacuum tube circuit preamplifier based on a design that has been used in several famous devices from the 50s,” but that doesn’t really tell you very much. The face of the unit sports a vintage green powdercoat that harkens back to that era, but the color is not so strongly associated with a particular piece of hardware that you’d know what to expect from within.
If you poke around a little online, though, the designer of the MP566 at least lets on that the design is a “modified Bill Putnam (UREI) design.”
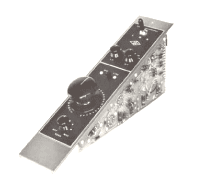
Aha! Bill Putnam strikes again. Putnam was the genius behind the later-developed 1176LN compressor, the circuitry of which graces our racks in the form of four Hairball Audio/MNATS FET/500 units. A little more sleuthing, and it turns out that the MP566 is paying homage to the UREI 610 preamp.
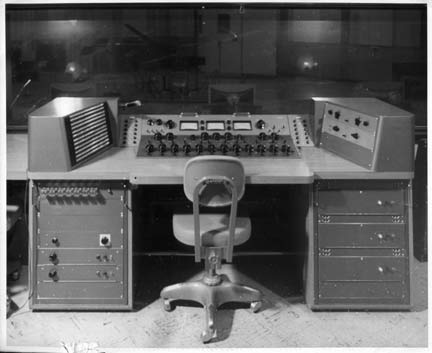
Bill Putnam, Sr., through his company, UREI, built the 610 mixing console in the late 1950s. The 610 preamps were included in those units. Putnam’s consoles were unusual because up until that point, recording consoles were usually completely built from scratch, with the components hand-wired into a custom machined piece of metal. Putnam’s 610 was the first console to use a modular approach to design — a console frame with the components of each channel incorporated into a single discrete module. Putnam’s studios were high-volume rooms, and downtime cost the studio owners significant amounts of money. So if a channel stopped working, the affected module could quickly be swapped out with a spare, and the session could continue with minimal downtime.
[blockquote blockquote_style=”boxed” align=”right” text_align=”left” cite=”” style=””]Bill Putnam, Sr.’s Model 610 console was the first to use a modular design.[/blockquote]
Not surprisingly, the 610 preamps sounded great. Putnam’s company built consoles for artists such as Ray Charles and Frank Sinatra, and this particular model was responsible for a huge number of hit records throughout the 1960s.
Putnam’s son, Bill Putnam, Jr., took over Putnam’s company, Universal Audio, after Putnam, Sr.’s death, and the company has paid particular attention to keeping the elder Putnam’s designs alive. UA resurrected the 610 in April 2001, and has continued selling the reissued 610 in various forms right down to the current day.
So that’s a little background on the gear that the SoundSkulptor MP566 is trying to emulate. As of this writing in 2016, a single channel of the UA 610 preamp goes for $1000, and comes in a metal case with a handle. So the SoundSkulptor appeals to us for two reasons: one, the DIY version sells for about $450 (depending on the exchange rate, and including shipping and import duties to the USA), so we can get two channels of 610-style preamps for the price of one of UA’s “official” units. Two, since the MP566 is a 500-series unit, they will integrate nicely into our existing outboard rack.
Now, on to the build!
This is my first SoundSkulptor kit, but I’ve read good things about them. So I was curious to see how they compared to the other gear I’ve built thus far. I would put the build difficulty at around the same level as the main board of the FET/500 compressor, and a bit above the complexity of the Elements Bronze. The SoundSkulptor doesn’t have anything nearly as tricky to build as the LED meter board on the FET/500, though. The vacuum tube itself (a 12AT7) plugs into a socket that’s soldered to a perpendicular “shelf” on the main board, so even that part is really straightforward and easy to replace if the tube wears out. There’s really nothing too hard on the soldering & hardware assembly side of things. Total build time for the first one was about five hours.
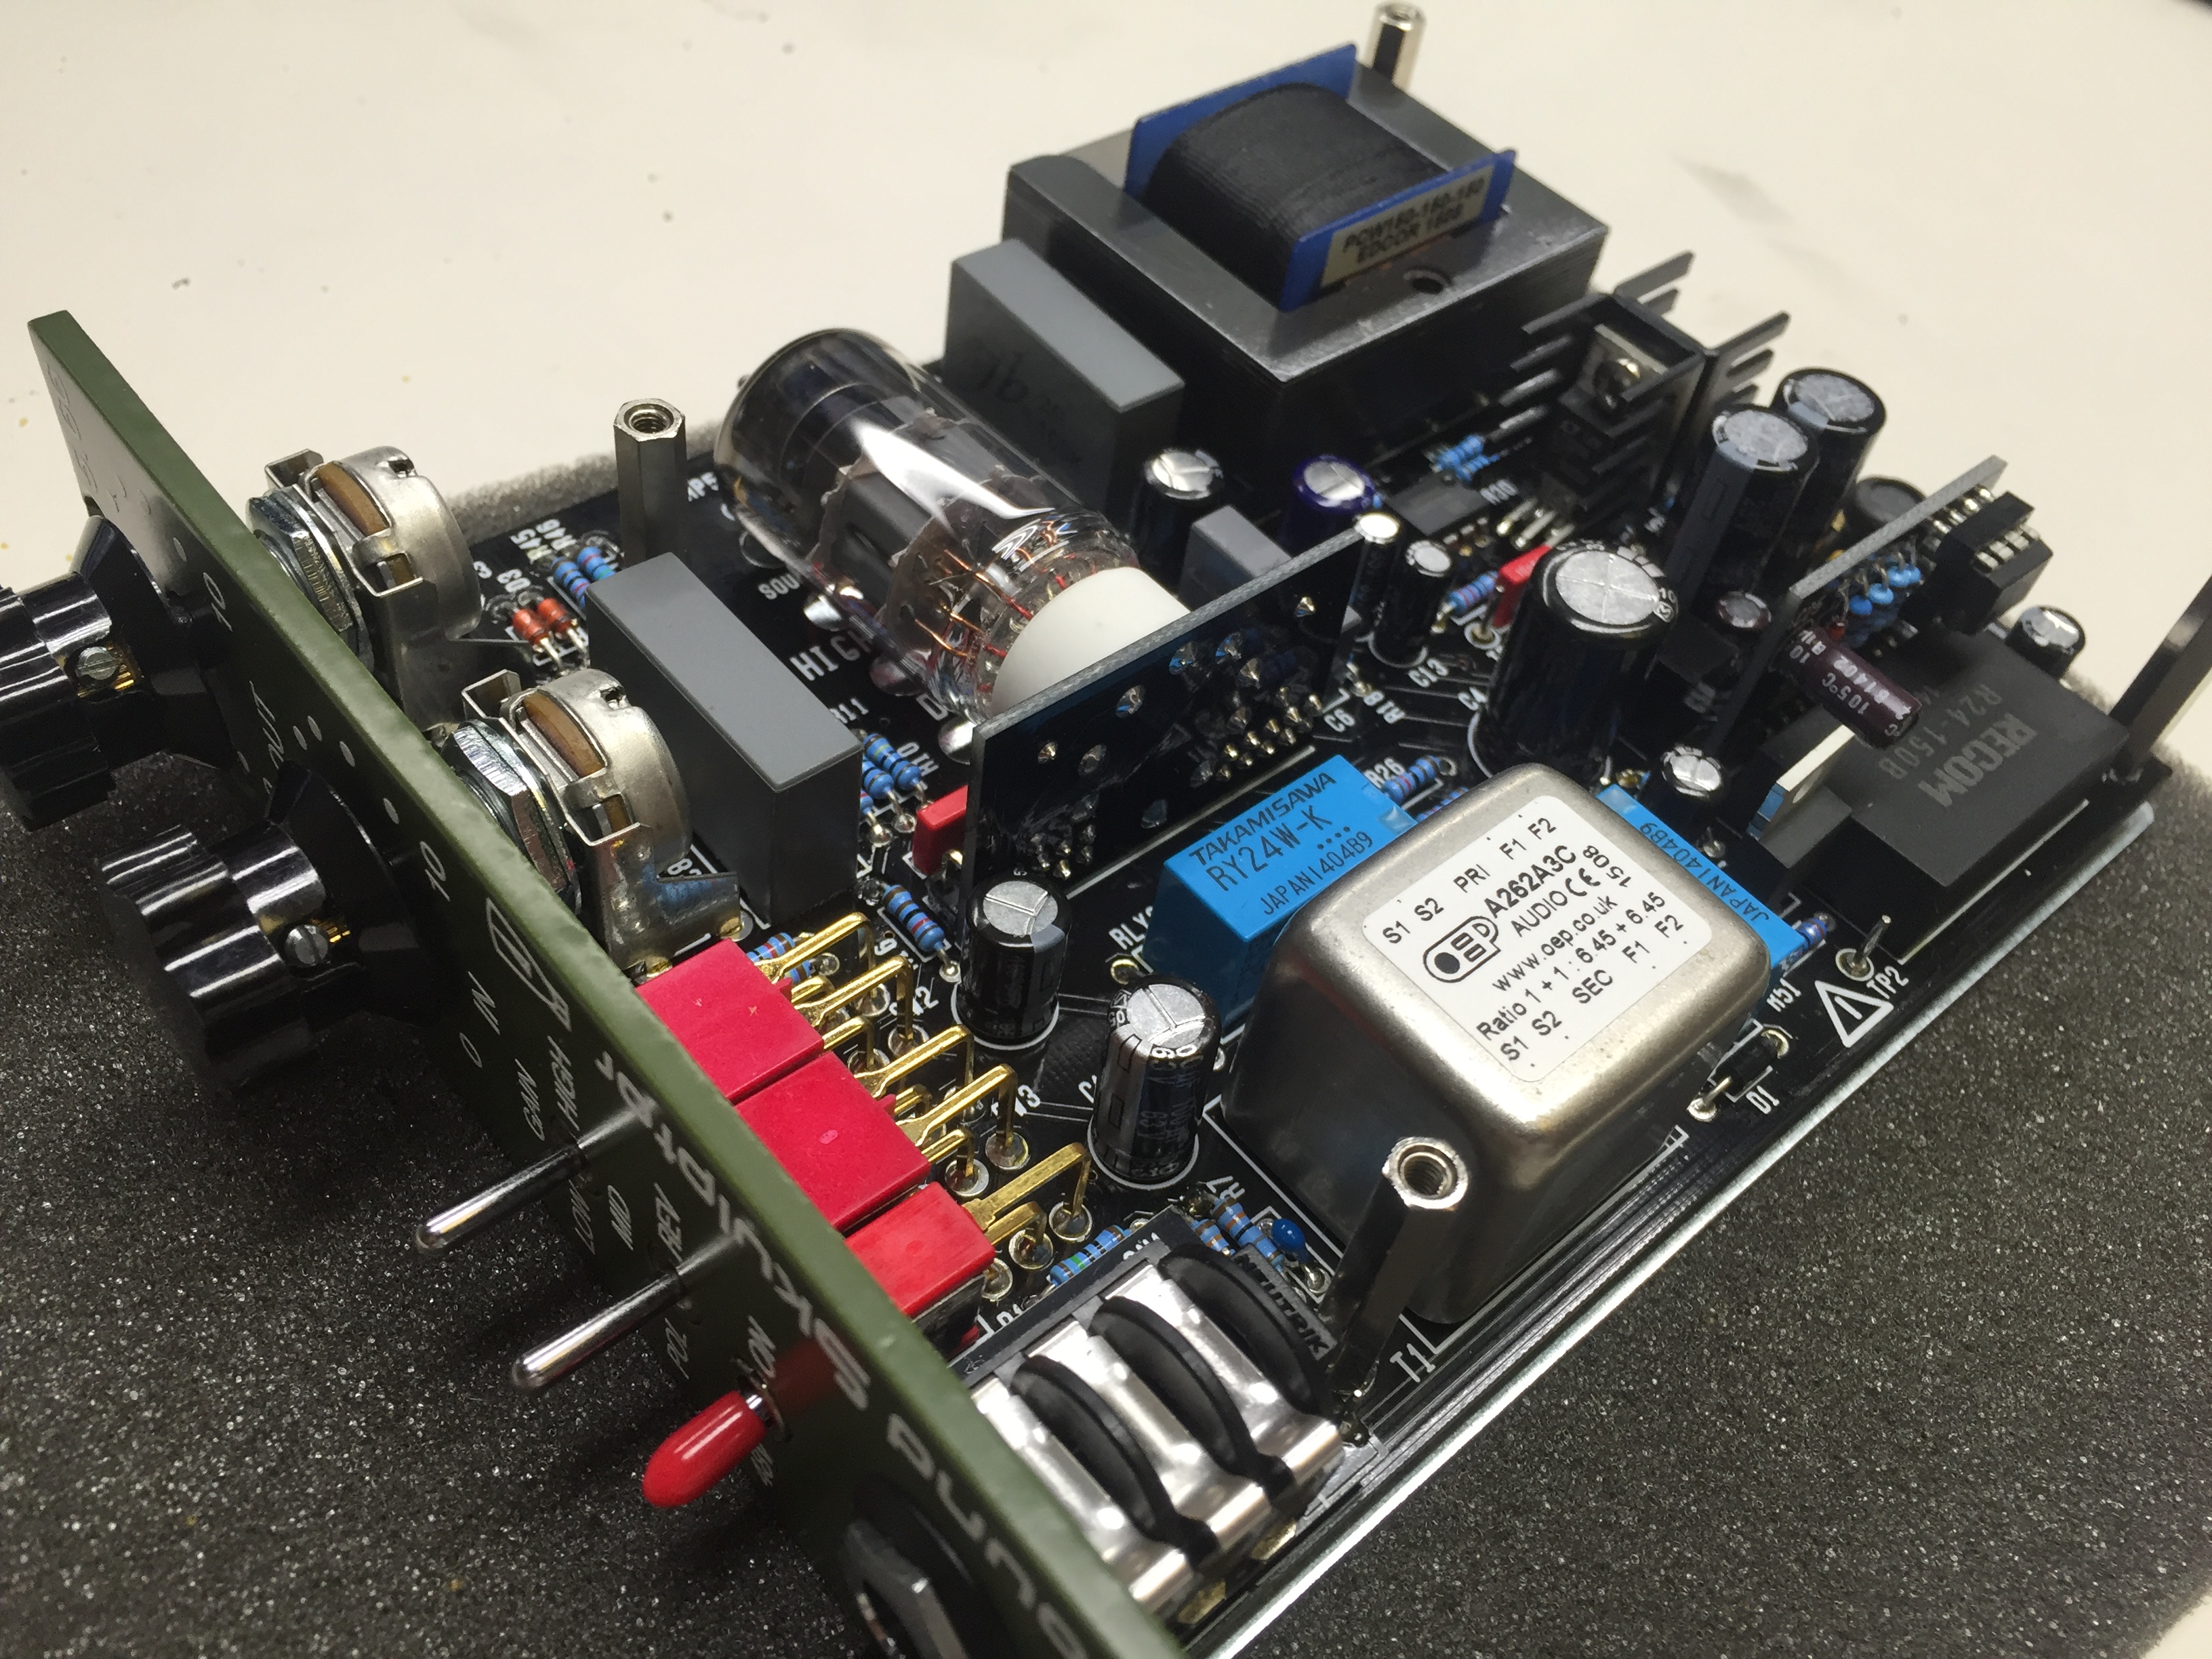
On the setup & testing front, though, the presence of a vacuum tube means we’re dealing with HIGH VOLTAGE. As in “225 volts of heart-stopping, this-stuff-will-kill-you” high voltage. When I was a beginner, I’d always get a little nervous about building anything at or above household voltage, but I’ve gotten more comfortable with it as I’ve gained more experience over the years. It requires a lot of respect for what electricity can do and being REALLY sure the power is off and everything is discharged before touching anything that might still be carrying enough current to kill you. Once this kit is completed, there’s a nice, solid cover that goes over the board, so it’d be fairly difficult to touch the wrong thing once the unit is installed in the rack and fully assembled.
The thing is, vacuum tubes really require a specific amount of voltage to operate properly, and if they’re not getting that, the unit isn’t going to sound right. So before you can completely button up the unit, it’s critical during the assembly phase to connect the MP566 to an “extension cable” running out of a slot in the 500 rack, then connect a multimeter to a couple of points on the board to ensure the proper voltage is reaching the tube.
I pull EVERYTHING ELSE out of the 500 series Workhorse rack (so that the worst that can happen is that I blow the fuse on the rack, but I don’t destroy any of my other modules). Having double- and triple-checked that I’ve got the right leads connected to the right pins on the board, I step several feet back from the board, say a quick prayer that I’m not about to experience a small flash fire, and power up the rack.
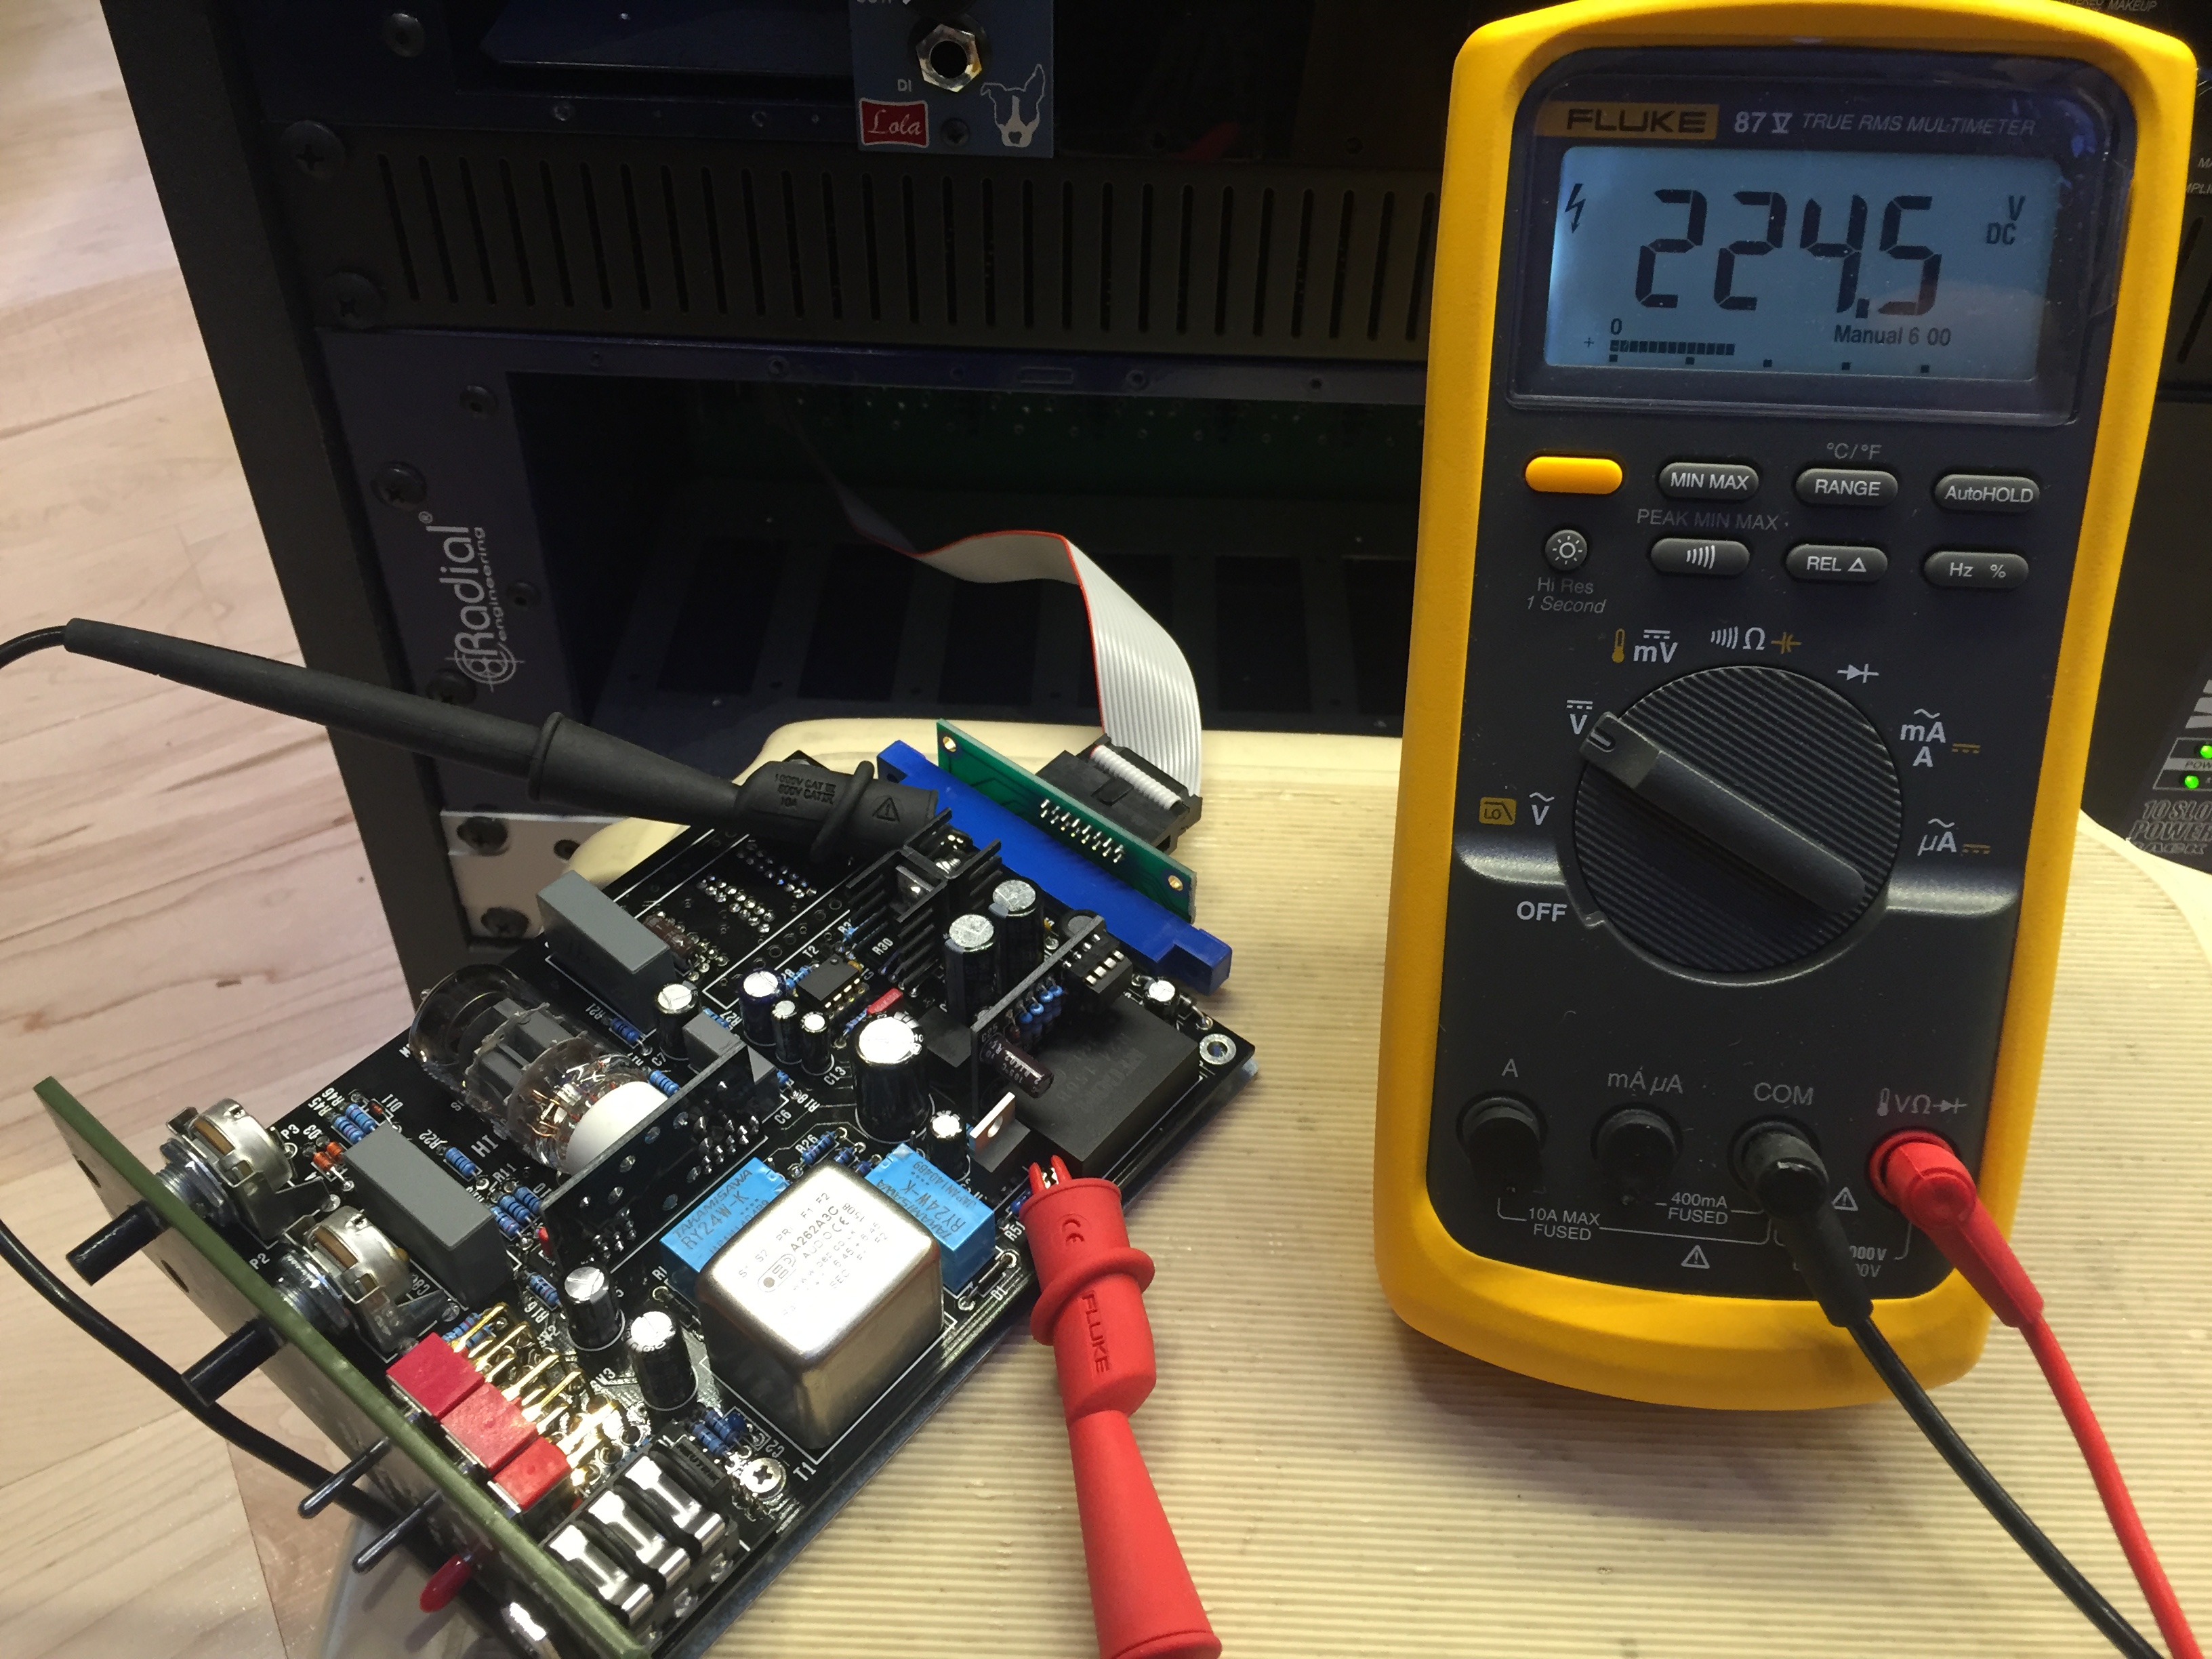
Hallelujah! 224.5 volts! It works!
With one successful build under my belt, I felt a little more confident about the second one. Clear everything out of the rack, connect the second unit to an extension cable, and —
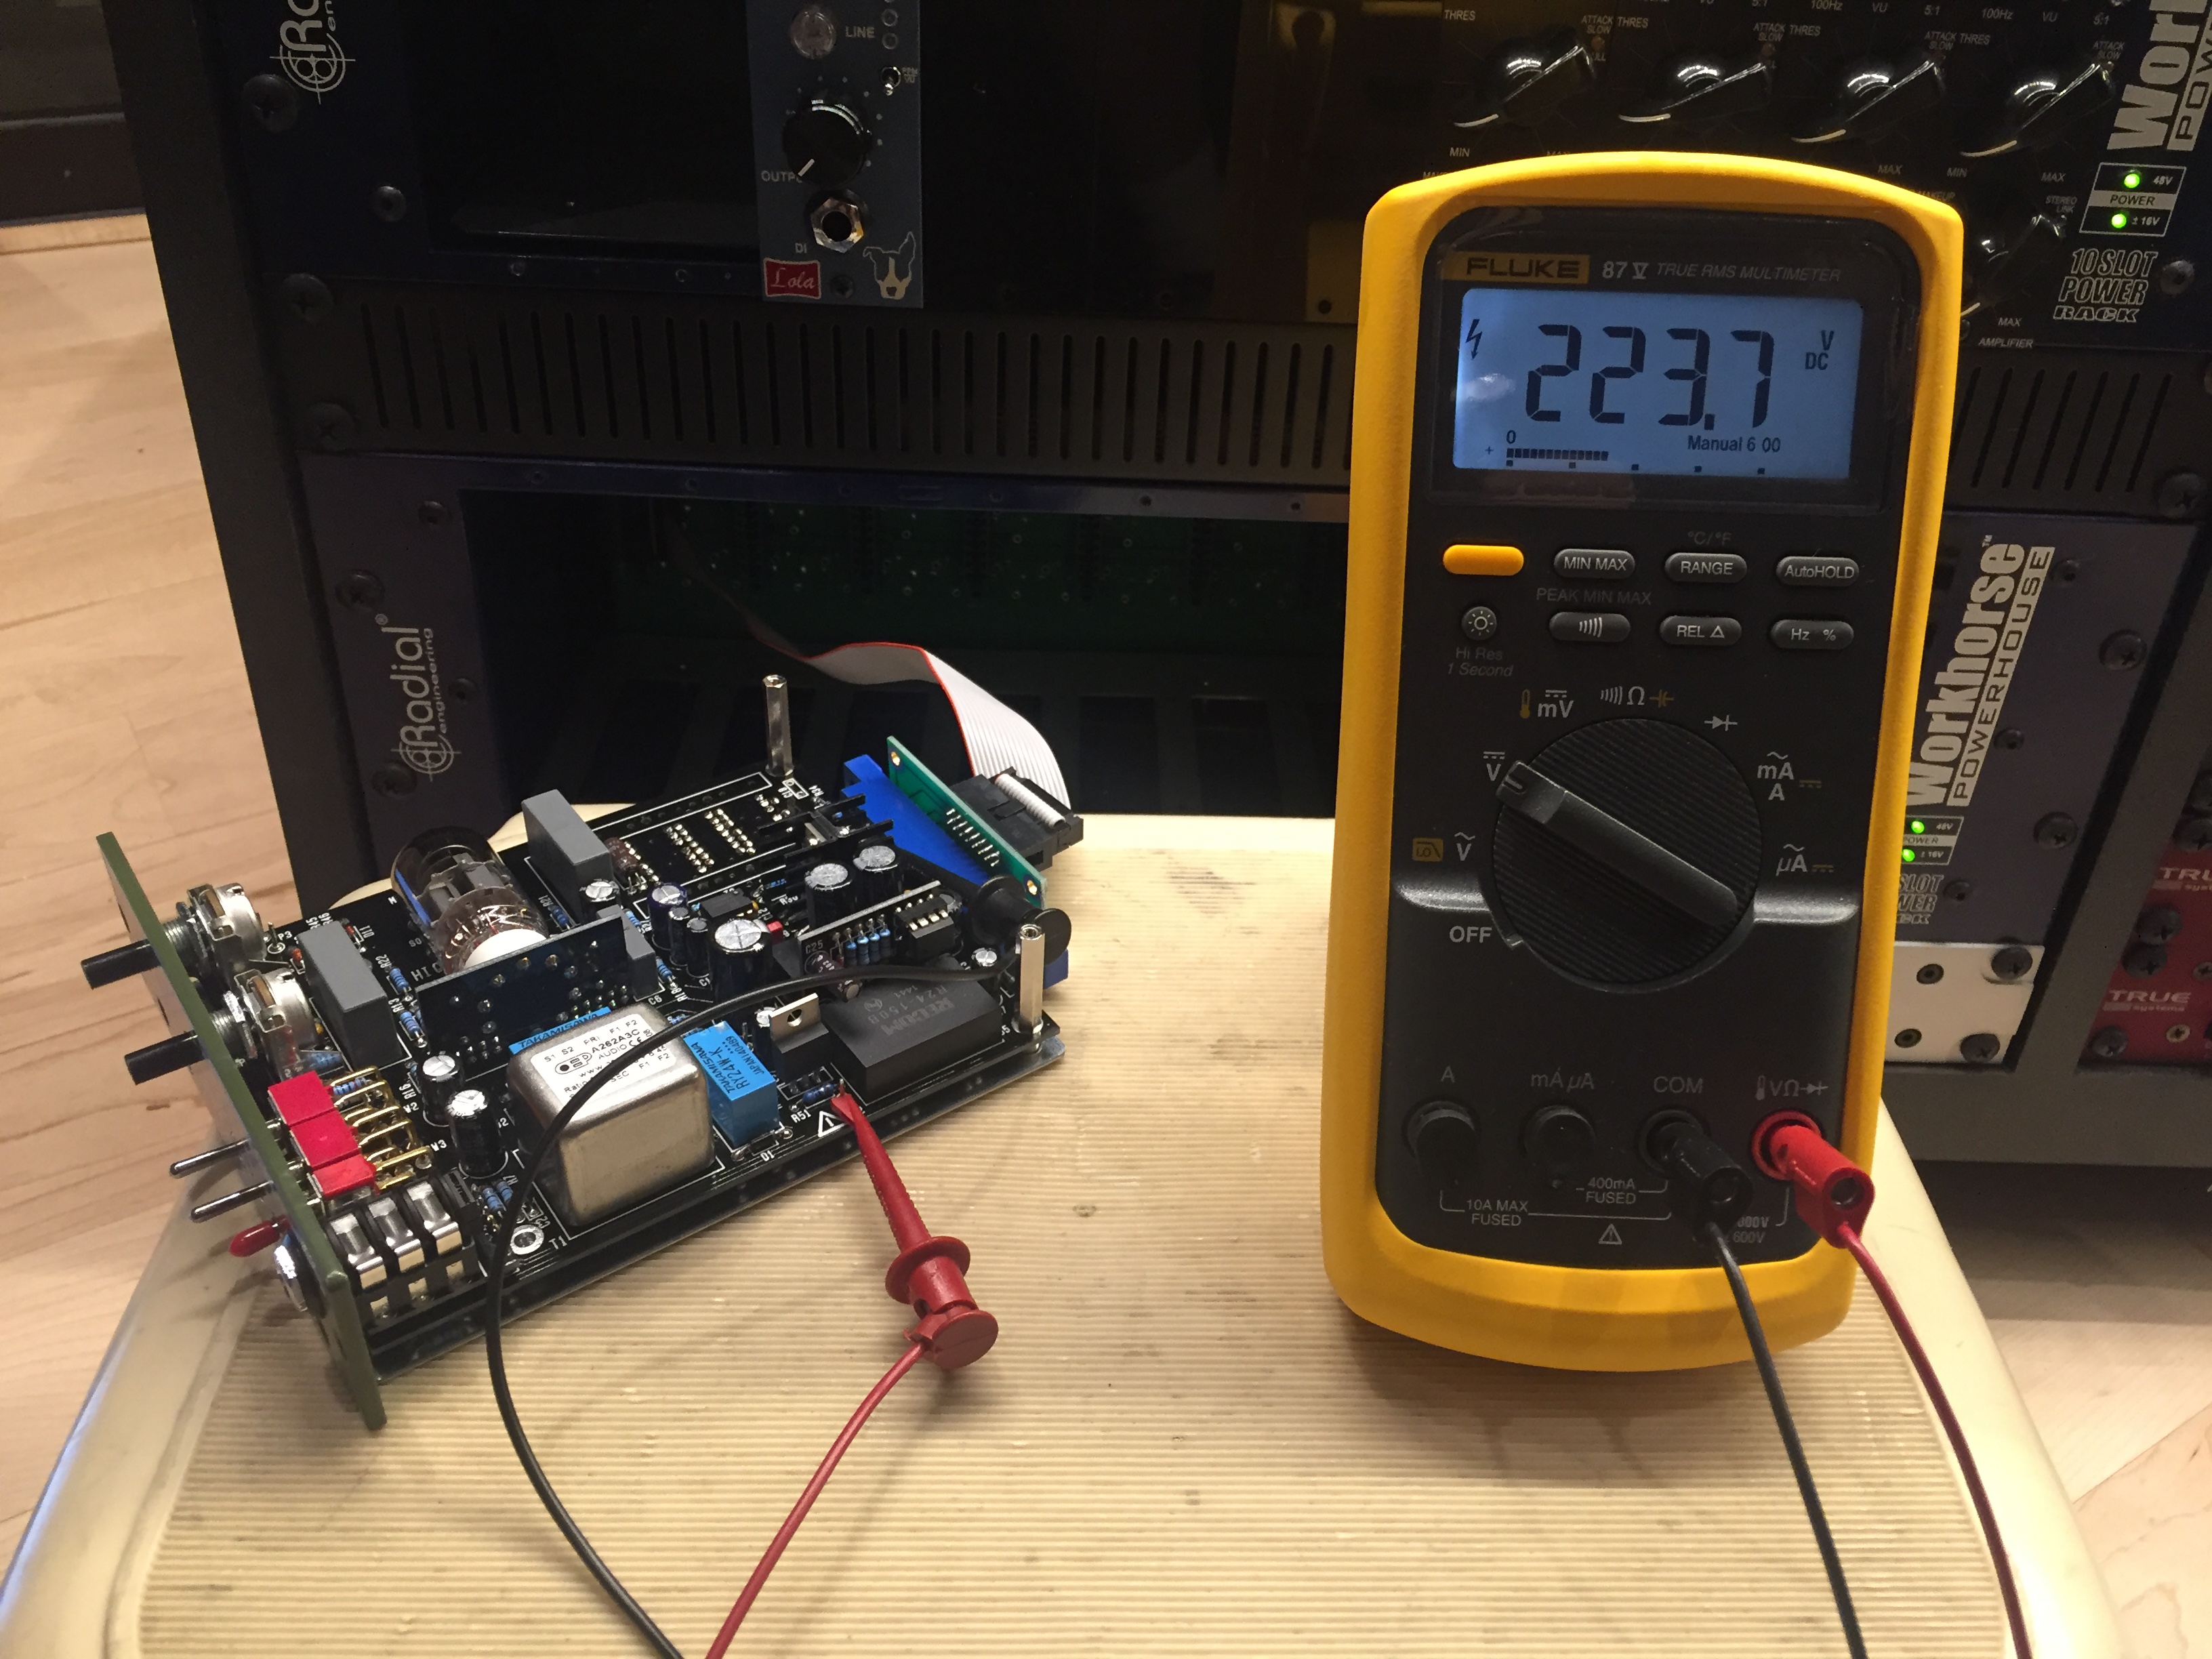
Success! Not quite 225 volts, but it’s within range and should do just fine.
Being a vacuum tube preamp, we’re expecting these to have that warm, vintage roundness typical of classic recordings. I plan to try these out on kick drum for an upcoming project, but I’d expect these would work really well on bass guitar or anything else that would benefit from a slightly darker tone.
Vacuum tube goodness awaits!